Getting into the Pivot Table Environment
Steps for creating a new pivot table:
First, make sure the active cell is inside your table of data by clicking somewhere inside the table of data. Then choose the “Insert” tab on the ribbon.

Click the “PivotTable” button (located at the far left of the ribbon), and then click “OK” in the dialog box that appears.

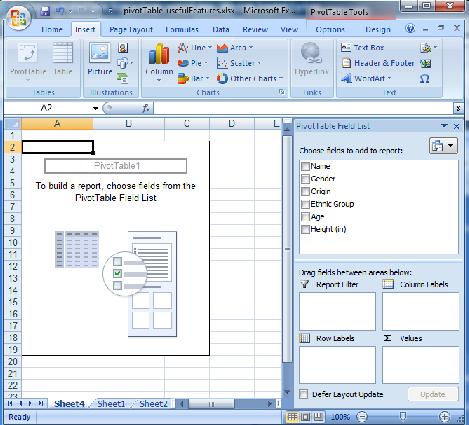
A new worksheet has appeared in the workbook, with a special pane at the right hand side.

This new worksheet is used to operate the pivot table and all its features.
About pivot tables
The pivot table environment might seem somewhat scary the first time you see it, but as you gather some experience and practice using it, you soon start to see that there sure is a method behind the madness.
Pivot Tables take data management for the everyday user to another level. Using simple commands and drag and drop gestures, you can organize long lists of information and create custom tables from a list of entries or a database.
The tables you create with this tool have dynamic features, which means they stay connected to the original list of data. As you modify your database, you can have your pivot table updated accordingly.
Just as any of the functions we have looked at in this section, pivot tables are a great tool to master for people who work with comprehensive lists on a regular basis.
