
Using Excel Find and Replace tools
What are these tools good for?
Looking for a name inside a list of 20 names is easy – you can simply look it up with your eyes. But looking for it inside a list of 400 names – well, it starts to be a problem. And what about a bank manager looking for the account number 9374857 among all of his branch accounts?
The “Find” tool in Excel enables you to type a query, and let Excel find it for you. If a match is found – the active cell will “jump” right into it.
The “Replace” tool allows you to make a large systematic change in a matter of seconds. Imagine the telephone area code changed from 072 to 074. If you have a database with telephone numbers, you can use this tool to systematically change all these numbers.
Another example:
Consider you have a shift schedule set for your business and “William” is placed in for shifts in the following month. Suddenly William has resigned and Claire came instead.
Using the “Replace” tool you can immediately replace all “William” by “Claire” in your spreadsheet (or select a certain portion of the spreadsheet, and replace only within the selected area).
You can feel free to experiment with this tool, since the “Undo” button is always available immediately afterwards.
How to use the "Find" tool
Step by step guidance:1. Click the binoculars button, and choose “Find”.
Alternative: press together [Ctrl]+[F] keys on the keyboard.
The “Find and replace” dialog box will appear, in which the “Find” tab is selected:

2. Type down the query you wish to look for.
3. Click the “Find next” button, or press [Enter] on the keyboard.
The active cell will jump immediately to the first match found.
4. You can now close the dialog box by either clicking the “Close” button or by pressing “Esc” on the keyboard, or you can look for more matches by clicking the “Find next” button again.
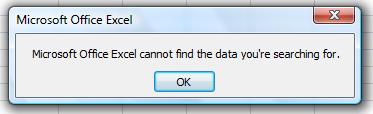
In case Excel doesn’t find any match, the following message will appear:
Limiting the search area
Selecting a range of cells before conducting a search will limit the search to the selected cells only.Note that sometimes Excel doesn't find your query just because you didn't notice that some cells are selected. Even if you mistakenly select two cells, Excel will limit itself to look only inside these two.
How does Excel search your worksheet?
It starts from the location of the active cell, and goes to the right along the row. After finishing the row, its goes one row down and searches on the next row from left to right, and so on until the last row of you data. Then, it jumps back to the first row of your data, until reaching the active cell again.That gives high importance to the location (especially the row) of the active cell when conducting a search.
For example, if you have the word “smith” many times along your worksheet, and you start a search when the active cell is in address C8, the computer will find the match located in address K46 before it will find the one located in address E5. (This is because the search started at row 8.)